What you're aiming for
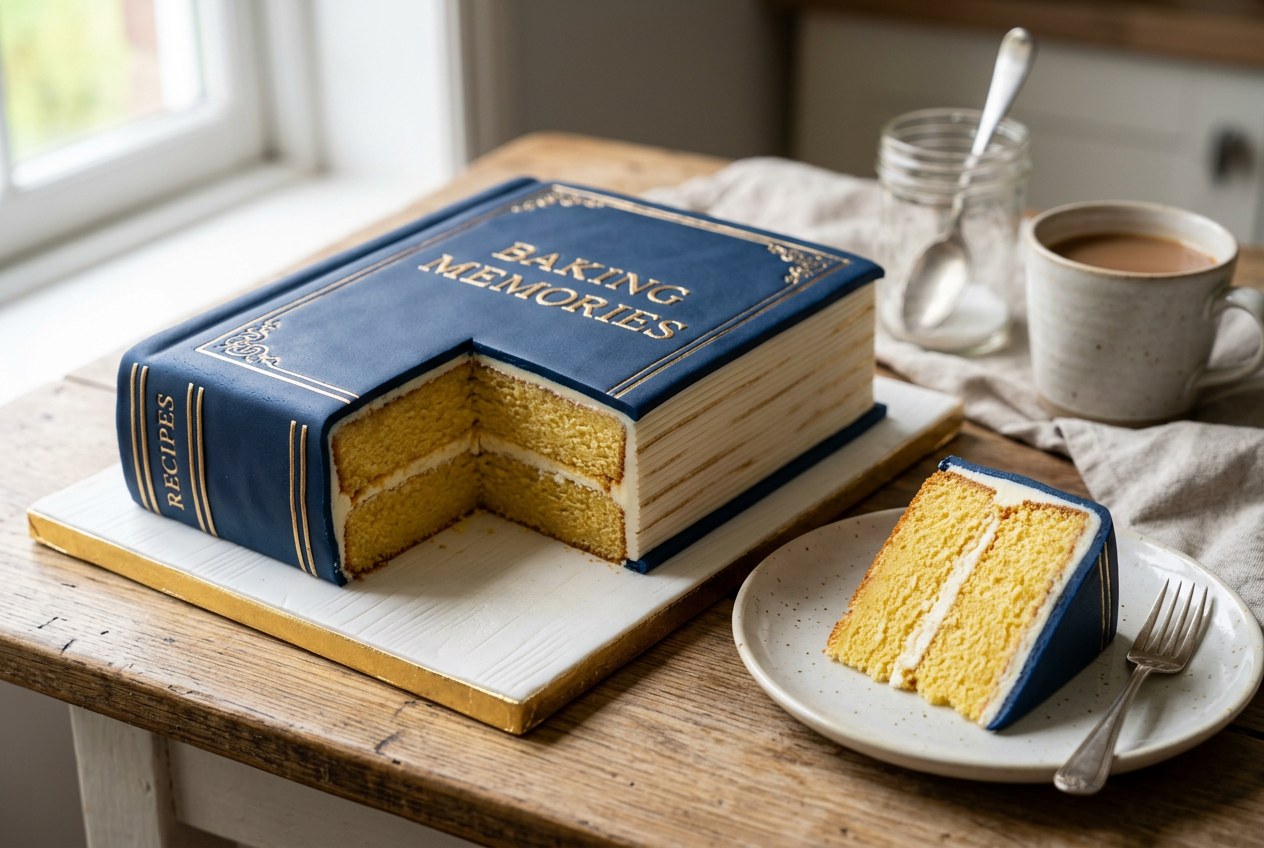
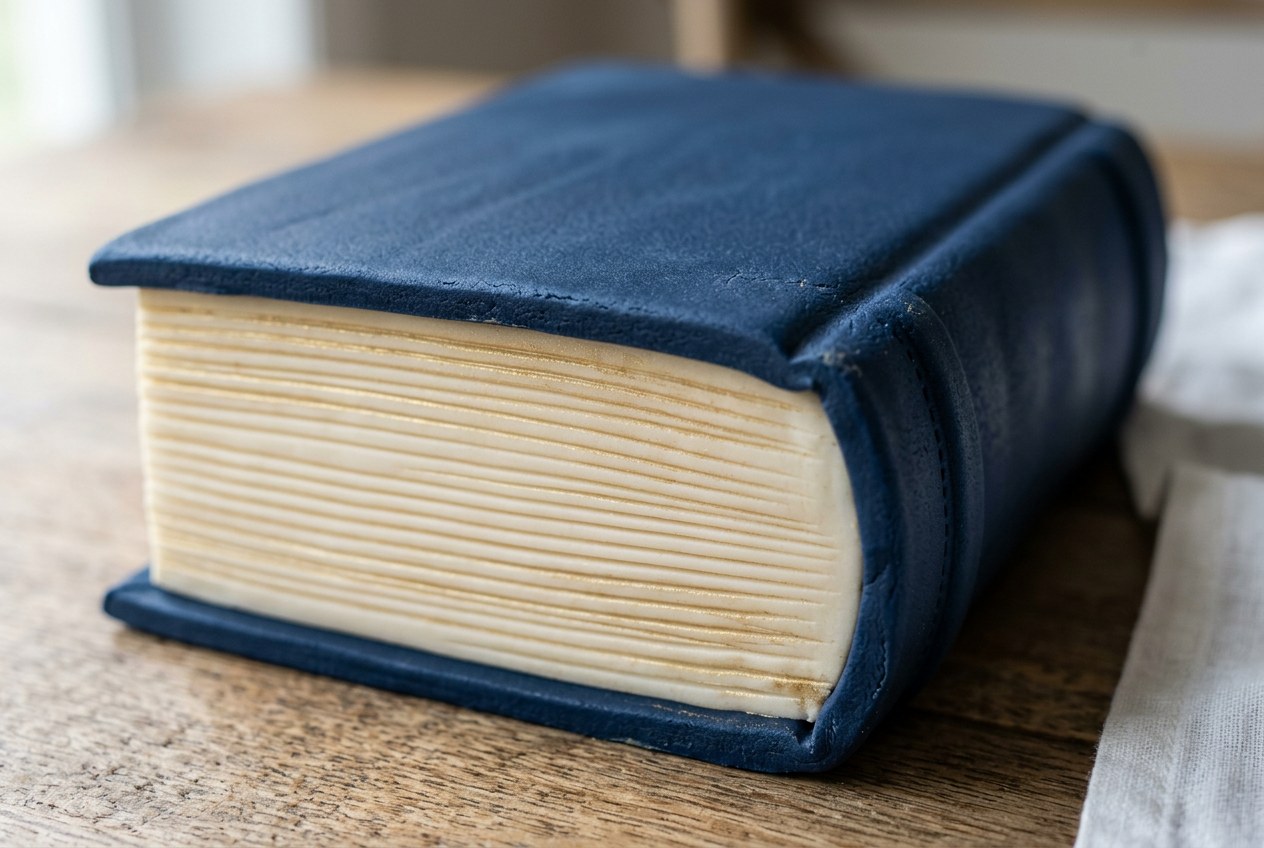
Reference images of a finished book cake. Tap any image for full resolution. These are AI-generated examples, not photos of a real cake, so treat them as the target look rather than an exact match.

The plan
Split it over two days. Cold, day-old pound cake carves cleanly; warm cake crumbles.
Day 1 · Bake
Mix, bake and cool the cake. Wrap it tight and refrigerate overnight. About 1.5 hrs, mostly oven time.
Day 2 · Build
Carve, crumb coat, add fondant pages and the cover. About 2.5 hrs.
Serve
Set it on a shelf or next to real books. Cut it in front of people. Best eaten within 2 days.
Shopping list
Tick items off as you go. US measurements. For flour and powdered sugar, spoon into the cup and level with a knife — don't scoop. Printable recipe.
Pound cake
Buttercream
Decoration
Tools
9×13 in metal cake pan, parchment, stand or hand mixer, long serrated knife, ruler, rolling pin, offset spatula (or butter knife), pizza cutter, cake board or large cutting board, small paintbrush, plastic wrap.
Step by step
Diagrams show what each stage should look like. Target size: 9 × 6½ in, 1¾ in tall, roughly a real hardcover novel.
-
Make the batter
Day 1 · 20 minHeat the oven to 325°F. Grease the pan, line the bottom with parchment, grease again.
- Beat butter and sugar 3–4 min until pale and fluffy.
- Add eggs one at a time, beating after each. Add vanilla.
- In a separate bowl whisk flour, baking powder and salt.
- On low speed, add flour mix in 3 parts, alternating with milk in 2 parts. Start and end with flour. Stop as soon as no dry streaks remain.
Overmixing makes a tough, domed cake. Stop early.
-
Bake and cool
Day 1 · 45–55 min bake + 1 hr coolSpread batter evenly into the corners. Bake until golden and a skewer in the center comes out clean. Start checking at 45 min.
Cool in the pan 15 min, turn out onto a rack, peel off parchment, and cool completely.
Wrap tightly in plastic and refrigerate overnight.
The lower temperature stops the edges browning hard before the middle sets.
-
Level and cut the block
Day 2 · 15 minFreeze the cake 30 min so it's firm. Using a long serrated knife and gentle sawing strokes:
- Slice off the domed top so it's flat. Aim for 1¾ in tall.
- Trim the browned crust from all four sides.
- Measure and cut a rectangle 9 × 6½ in. Leftover scraps are the baker's snack.
Use a ruler. A slightly crooked book looks fake fast.
-
Shape the spine (optional)
5 minPick one long side as the spine. Round its top and bottom edges slightly. On the opposite long side, carve a very shallow inward curve — real page blocks dip a little.
First time? You can skip this. A clean rectangle still reads as a book.
-
Crumb coat
10 min + 20 min chillBeat butter until smooth, add powdered sugar and milk, beat 2 min. Put the cake on its board.
Spread a thin layer over the top and all sides — just enough to seal crumbs and give fondant something to stick to. Smooth it as flat as you can.
Refrigerate 20 min until firm to the touch.
Bumps in the buttercream show through fondant. Flat now = flat later.
-
Add the pages
20 minKnead the white fondant until soft. Dust the counter with cornstarch and roll it about ⅛ in thick.
- Cut strips with the pizza cutter, the exact height of the cake.
- Press strips onto the front long side and both short ends. Leave the spine side bare.
- Trim flush at top and bottom. Smooth the seams with a fingertip.
-
Score the page lines
15 minPress the thin edge of a ruler (or the back of a long knife) lightly into the page strips to make horizontal lines all the way across. Space them about ⅛ in apart.
Press, don't drag. Light, straight, continuous lines look like paper; deep cuts look like corrugated cardboard.
-
Wrap the cover
25 minThis is the step that makes it read as a hardcover.
- Roll the navy fondant ⅛ in thick into a long rectangle, about 15 × 11 in.
- Bottom cover: cut a piece the size of the cake plus ⅛ in on the three page sides. Lay it on the board and set the cake on top, flush with the spine edge.
- Top cover + spine: cut one piece wide enough to run up the spine and across the top. Press it onto the spine first, fold it over the top, and smooth from the spine outward to push air out.
- Trim the three open edges with a sharp knife so the cover sticks out ⅛ in past the pages.
Air bubble? Prick it with a pin and smooth it flat with your palm.
-
Title and finish
15 min- Hinge: press a ruler edge lightly along the top cover about ½ in in from the spine. Real hardcovers have this groove.
- Title: write a title and author on the top cover and spine with the gold edible marker. Or mix luster dust with a few drops of vodka and paint it on.
- Gilded pages (optional): dry-brush a little luster dust along the page edges.
- Brush off any visible cornstarch with a dry, clean brush.
Copy the title layout from a real book on your shelf. Centered title, smaller author name below.
If something goes wrong
| Problem | Fix |
|---|---|
| Cake domed a lot | Normal. Level it off. Next time, lower oven to 315°F. |
| Cake crumbles while carving | It's too warm. Freeze another 20–30 min. |
| Fondant tears when lifting | Rolled too thin or too dry. Re-knead, roll slightly thicker, lift over the rolling pin. |
| Fondant sticky | Too warm or humid. Dust lightly with cornstarch; work in a cool room. |
| Fondant won't stick to cake | Buttercream set too hard. Brush the spot with a tiny bit of water. |
| Cover edges look ragged | Trim with a fresh, sharp blade in one smooth pass instead of sawing. |
Things that vary
- Cups vary by how you fill them. Scooped flour can run 15–25% heavy and make the cake dry and crumbly. Spoon and level, or use a kitchen scale (3¼ cups flour = 390 g).
- Bake time depends on your oven and pan; dark or glass pans bake faster. Trust the skewer, not the clock.
- A 9×13 pan bakes about 1¾–2 in tall. Your final height is whatever you get after leveling.
- Fondant brands handle differently. Satin Ice is softer and easier to smooth; Wilton is stiffer.
- Only use luster dust and markers labeled edible. "Non-toxic" or "for decoration only" products are not food-safe.
- Don't refrigerate after the fondant is on; condensation makes it sticky. Keep it in a cool room, covered loosely, up to 2 days.